All posts by admin

What Can I Do To Minimize My Risk Of Getting Broken Into?

Car theft is a problem that likely won’t go away anytime soon. It seems like I hear of cars getting broken into or stolen every other day. But, what can we do about it? That question got me thinking of a few things we can do to lessen the risk of a thief breaking into our vehicles.

1. Don’t keep valuables in your car.

If there’s nothing of value in the car, a would-be-robber has no reason to break in.

2. Keep your windows rolled up.

I see it all the time, people running into grocery stores or convenience stores and leaving their windows down. That’s just asking for someone to come along and swipe their phone that they laid in the center console.

3. Park in a well-lit area.

If you park somewhere there is an abundance of overhead lighting, robbers generally will look the other way since they will be in plain sight.

4. Install a theft-deterrent system.

Aftermarket alarm systems are very good at deterring robbers, especially if someone decides to open your car door, or break a window in the middle of the night.

5. Install a visual deterrent.

The Club is a archaic and clunky, but it works. If a robber were to walk up and see something like that on the steering wheel of your car, they will just keep walking. Another visual deterrent is a steel locking collar that stops people from breaking open the steering column and hot-wiring your car.

6. Install a tracking device

If your super serious about getting your car back in the event of theft, there are a few tracking systems that you can have installed. They won’t stop someone from stealing your car, but it will make it harder for the thief to get away with it. Police will have the ability to track where your vehicle is, in the event of someone taking it.

What methods do you use? Have you ever had your car broken into or stolen? Find me on Facebook and let me know!

Driving on Ice!

I decided to expand on my last post. I mentioned that we generally have 1-2 freezes per year here in North Texas. It wreaks havoc on our transportation system, since it happens so rarely and us Texans are not used to it. If my driveway is covered in ice, I stay home. I usually see people slipping and sliding down my street, hitting curbs, mailboxes and even other cars! This post is about driving safely in ice and snow if you absolutely have to go out in it.

1. Check your tires.

Your tires are what keeps you going in the direction that you want to go. If your tire tread is worn thin, you probably shouldn’t be out in the freezing temperatures.

2. Run the A/C.

I know, it seems redundant, but it actually works! Turning on your air conditioner and selecting the ‘fresh air’ setting will remove the condensation on the inside of the vehicle, helping with your visibility.

3. Turn your headlights on.

Newer cars will always have running lamps on, if they don’t, turn them on. Visibility is key, for your own safety and the other drivers on the road.

4. Keep your eyes peeled for ‘black ice’.

Black ice is the transparent sheet of ice that you never see coming. It may look like a puddle or not look like anything at all. If you find yourself driving on it, jerky movements are the last thing you want to do.

5. Visualize your trip.

If it’s freezing outside and there’s snow and ice on the ground, you definitely don’t want to be driving over any bridges. Those are always the most dangerous places to be driving during sub-zero temperatures. Take an alternate route to stay off of bridges and on solid ground.

6. Don’t depend on the technology

Just because your car has the latest sensors and traction controls, doesn’t mean they can save your car if you make a bad decision.

Keep these tips in mind next time you find yourself venturing out into the winter wonderland. The best advice I can give is to stay at home and start a fire in the fireplace. You may be able to control your driving, but you can’t control other drivers!

If you can think of anymore tips or have a harrowing snow day driving story, find me on Facebook and let me hear about them!

It’s Time To Winterize Your Car!

It got a bit chilly last night and that got me thinking about the things I need to do to make sure my car is prepared for the colder temperatures. I’ve compiled a list of the things that I could think of, off the top of my head.

1. Check your tire pressure.

When the temperatures drop, your PSI drops too. Every 10 degrees lower than normal drops it by about 1 PSI. Since winter always presents the opportunity for running into an ice patch, traction is of the utmost importance.

2. Check your battery

Colder weather means less power coming from your battery. Double-check the terminals to make sure corrosion isn’t preventing your battery from connection to the cables. You can always read the article I wrote a couple of weeks ago to help with this.

3. Inspect your windshield wipers and wiper fluid.

The morning after a freeze is the worst time to find out that your wipers are in terrible condition. With our harsh summers, your blades could probably stand being replaced. In freezing weather, you run the risk of rain and snow re-freezing on your windshield while you’re driving. To combat that, use a de-icing wiper fluid. It will help with melting standing ice and prevent re-freezing.

4. Check your anti-freeze mixture.

The ideal mixture of water to anti-freeze is 50:50. If you deviate from that, you run the risk of freezing in the event of a deep freeze. Properly mixed anti-freeze won’t freeze until -34 degrees. Most store bought anti-freeze is premixed, but always double check. If you’d like to check your mixture levels, you can get a tester at your local auto parts store.

5. Check your hoses and belts.

Cold weather can harden the rubber that your belts and hoses are made of, so check them before the big freeze gets here.

6. Check your owners manual for changes in oil viscosity.

Some engines need thicker oil during the winter. Check with your owner’s manual to be sure you’re using the correct weight engine oil.

If you can think of any other tips to make your vehicle’s life easier during the upcoming winter months, find me on Facebook and tell me about them!

When Should I Replace My Windshield Wipers?

Windshield wipers increase your visibility during a rainstorm.

One of the most important factors of safe driving is your visibility. If your vision is obstructed in any way, you are putting yourself, your passengers and other people on the road at risk. Driving in the rain or snow is a risky proposition to begin with, but having worn wiper blades makes it even worse. Your windshield wipers are very possibly the most important feature on your car when there’s a downpour. If they aren’t performing at the highest efficiency, then you can’t see the things that you need to see. Ninety percent of the decisions you make while driving, rely on your ability to see clearly. During a rainstorm, your car is being bombarded with rain in multiple instances, from the sky, from the ground, and from other cars.

Most experts say that you should replace your wipers every 6 to 12 months, but with our harsh Texas summers, I’d keep it closer to every 6 months. During the months of July and August, when the heat is bearing down on us, it’s warping and cracking the rubber of your wipers, making them less and less effective. Even our yearly freeze takes its toll on them too. When you use the wipers as ice removers, you tear and disfigure them and they no longer make full contact with the windshield.

Replacing your wipers is a simple and fairly cost-effective fix. A pair of replacement blades will generally run you $15-40. The name-brand, high-quality blades, or odd sizes, may run a bit higher. If you must drive when it’s pouring outside, then a functioning set of wiper blades is well worth the money you spend to help you see better.

Giving a Dead Battery a Jump

It’s a common problem, I’ve done it more than a few times. I’ve left my headlights on, my interior light, too. I’ve even shut my car door, thinking I closed it, but in fact, it never closed completely. Most new cars have a way of shutting them off after a period of time, but older cars just arent’t that advanced. What happens when you get in the car first thing in the morning and you reach in a turn the key? Nothing. Nothing at all. That’s when you have to ask your neighbor for a jump.

It’s scary how much I see people jumping cars incorrectly. It may seem like an easy thing to do, but it can be done wrong, and in some instances, it can cause damage to your car and even harm you. Here are a few points to consider next time you find yourself helping a neighbor or asking for help with a dead battery yourself.

1. Make sure the 2 vehicles are not touching. If they are, then you could create a current that could run through the car and damage the electrical system.

2. Turn the car giving the jump completely off. (The car needing the jump should already be off.)

3. Connect the red (positive) cable to the good battery’s positive terminal, then connect the red (positive) cable to the dead battery’s positive terminal using the same cable.

4. Connect the negative (ground) cable to the good battery’s ground terminal, then connect the negative (ground) cable to a solid ground (unpainted frame member or engine bracket) on the other car. Do not connect the negative terminal on the good battery to the negative terminal on the dead battery! Doing so will cause a spark and could ignite the battery. Connecting the cable away from the battery minimizes that risk.

5. Make double sure that the cable ends to not touch each other and the cables are not in the way of any moving parts or pulleys on the engine.

6. Start the engine in the vehicle with the good battery and run the engine at a fast idle for several minutes before attempting to start the vehicle with the dead battery. This will allow the good battery to pump more juice into the dead battery without causing a severe drain on it.

7. Start the vehicle with the dead battery. Once the vehicle has been started, carefully remove the jumper cables, keeping the metal ends away from each other until all 4 clamps have been successfully removed.

8. Drive the vehicle with the low battery for at least 30 minutes to recharge your battery. Driving time may need to be increased if your battery is close to the end of its life cycle.

There you have it! The safest way to jump a dead battery. Of course, you can always eliminate the need for a neighbor or a friend to jump your battery, there are numerous battery packs out there for a reasonable cost that you can keep in your trunk and use only when necessary. If your battery is kaput and can’t be jumped then hitch a ride over here and let us get you a new one!

Helpful Tips For Maintaining Your Car’s Battery

Maintain your car battery
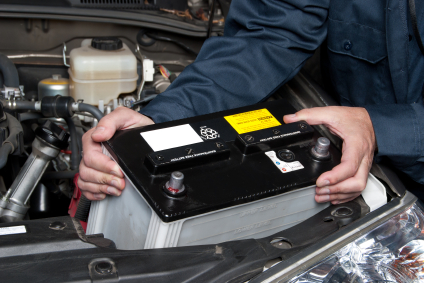
Car batteries aren’t cheap. I just replaced mine and it was just over $100! So that got me thinking about the maintenance that I should be doing to make sure that I don’t help end my battery’s useful life prematurely. I came up with 6 tips to get the most out of your battery.

1. Check the water level in your battery every 2-3 months.

Check on your battery for signs indicating the fill line. Don’t overfill your water reservoir, if you do, it will spill acid and corrode whatever it lands on. Also, double check to make sure your battery is one that requires water to operate, some newer models do not.

2. Clean the terminals with a wire brush every 6 months.

You know that weird stuff that grows out of your battery terminals? That’s not a good thing. That can also stop your battery cables and battery from conducting electricity. Get a good wire brush, remove the cables, and get all of that acid build-up off. Using a paste of baking soda and distilled water will definitely help remove the acid.

3.  Coat the battery with grease made for high temperatures.

Applying this battery grease will protect it from rust and corrosion.

4. Check your cell voltage every time you get your oil changed.

When you’re at the service center, getting your oil changed, ask the repairman to check your voltage. They should have a voltmeter to check the output of your battery. Make sure it’s somewhere around 12.5 volts when it’s fully charged.

5. Check your battery’s insulator.

These come in handy when you live in an area with extreme temperatures. Texas being one of them. Extremely high temperatures can cause the fluid to dry out more quickly and shorten your battery’s life. These insulators protect them from getting too hot or too cold.

6. Check with a service center for regular check-ups.

Only a car repair professional can diagnose problems with your battery. Always check with a pro before you spend the money on a new battery. Who knows? You may not even need a new one!

If you know of any other tips and tricks to keep your battery running strong, find us on Facebook and let us know!

A Lesson in Trip Planning from UPS

No Left TurnUPS delivers packages, everyone knows that. But what you may not know is that the drivers of over 95,000 trucks have plotted their routes to minimize the number of left turns they make. How many times have you sat at an intersection and waited for a few minutes while traffic passes you by? To the UPS drivers, that’s time and gas, both of which amount to money in their pockets. Why am I talking about this, you ask? We’re always looking for ways to save a little money here and there at the gas pump. I’m not saying that eliminating left turns is the way to saving tons of money or will help your children’s college fund, but it can help your car get anywhere from 3-5% better gas mileage. If UPS can shave 28.5 million miles off its delivery routes by planning ahead, maybe we can work it into our daily trips. Another tip you can learn from any kind of delivery driver is to make multiple stops on the same trip. If you need to go more than one place, make it a habit to kill multiple birds with one stone as trips back and forth to your house eat away at your gas tank.

Here’s a Mythbusters video that shows the concept and the results.

If you know of any other off-the-wall ways to save on fuel, find us on Facebook and let us know about them. Our readers would love to hear about them!

What’s The Real Difference Between Gasoline Octane Ratings?

This is a common question I get asked when people are buying their new cars. I think that there’s a lot of misconceptions about octane rating and the effect it has on your car. Commercials will often have you believe that a higher octane rating means a higher output, but that’s simply not the case. First of all, always check your owner’s manual for the type of fuel the manufacturer recommends. The reason for that is because some higher performing vehicles require higher compression to run at peak levels.

Octane Explained

With modern spark-induced engines, your car’s pistons compress air and gasoline and when the spark hits, it forces the piston away, creating the power that your vehicle has to go down the road. The temperature at which your engine operates during this time is very high and can often ignite the fuel within the compression chamber without the use of a spark, causing your engine to ‘knock’. Higher octane fuels ignite at a higher temperature so it will resist the ‘knock’ of prematurely ignited fuel. As I said earlier, some high performance vehicles recommend higher octane fuels due to the fact that their engines are finely tuned and regular gas may cause a ‘knock’.

Here’s a great video I found going into a bit more detail than I did.

There you have it! Higher octane fuels do not give you better gas mileage or higher power output, it’s all dependent on the engine that’s in your car. Again, be sure to check out your owner’s manual before coming to the conclusion of which octane rating gasoline you need to put in your car. The extra $4-5 per fill-up of higher octane gas is just not worth it if your engine is designed to run on regular gasoline.

If you have any auto-related questions, visit our Facebook page and ask!

Common Questions: What Does The “2” & “L” Mean?

Being in the car repair business, we field questions regarding the ins and outs of your vehicle on a daily basis. One that I get on a consistent basis asks what the different settings are for your automatic transmission. Everyone knows the P (park), R (reverse), N (neutral), and D (drive). But what are the other numbers and letters? Here’s a rundown and how/why they should be used.


3

This number denotes that when you are in this position, your car will not cycle out of 3rd gear. You’re probably asking yourself why you wouldn’t want to get out of 3rd gear, but there are situations that warrant it. You would use “3” if you were stuck in sand or snow (more power to wheels, less speed).


2

This number tells you that your vehicle will not cycle out of 2nd gear. You would use “2” if you were pulling a trailer up a hill (more pulling power, but less speed than 3).


L

You would use L or LOW basically when you need power to the wheels, like pulling a heavy trailer, driving on ice, or any situation when traction is of the utmost importance…


But remember, don’t drive in any of these lower gears for an extended period of time or at high speeds, these settings are situational.


Checking Your Tire Pressure With Your Eyes

4pcs-set-Car-Tire-Pressure-Monitor-Valve-Stem-Cap-Sensor-Indicator-Eye-Alert

Let’s be honest, we don’t check our tire pressure as often as we need to. In fact, we oftentimes let our tires run low way longer than we should. I’m just as guilty of it as everyone else. Regardless of the benefits of maintaining the correct tire pressure, we still are slow to stop by the 7-11 to put a few pounds of air in them. Don’t trust the tire’s shape to tell you whether or not they are low. If you have new tires without a lot of miles on them, they may not show any signs of low pressure until it’s beyond critical.

Properly maintained tires will:

  • Increase gas mileage
  • Enhance handling
  • Wear your tread longer
  • Help to prevent accidents

Most of our new Buicks and GMCs come with a tire pressure monitoring systems so you will be alerted when one of your tires is getting low, but cars more than a couple years old probably aren’t equipped with them. I’ve always used tire pressure valve caps. They offer a visual representation of your tire’s pressure. All you have to do is look at them and you can tell whether or not you need to put air in your tires. They are simple to use, all you have to do is replace your current valve stem covers with them and you’re all set! You can buy them in a few different tire pressure settings (28, 32, 36). Double check the placard inside your driver’s side door to make sure you keep the proper pressure in your tires. You can get them at just about any auto parts store for about $10 for a set of 4.